Style Attribute in HTML
Just like the class or id attribute, the style attribute is also a global attribute. As the name suggests, this attribute is used for styling. Well, styling is the part of CSS, but still, this is an attribute here, so we are going to see it in short here. You can say that you got to write some CSS here in the style attribute.
Well, using the style attribute is referred to as inline CSS styling. This is called inline styling, since we are doing the styling inside some particular element and not through some external stylesheet, or some internal style sheet(This is not a part of the discussion here, but if you want, you can explore it later).
Well, let’s take an example, if we want to make the background color of the body cream, then we can achieve it by writing the style attribute inside the body tag. It’s like we are telling that style of the body and giving it a cream color. Remember that the attribute is given in the starting tag.
We can do many other things as well as we can also change the color of some text in the heading, or paragraph or anything, or change the font size, or the font, and much much more. Again, we have to use the style attribute inside those tags.
Here is a code, which demonstrates the use of the style attribute. We are going to see this in CSS too, but it is great if we can do it here since it is part of HTML too(and we are learning HTML right now).
The thing is that we don’t have to keep giving the style attribute to each and every element in our HTML document. Well, for styling purposes, CSS is there for you.
However, if it is inevitable to use the style attribute, you are free to use it. But remember that the inline styling overrides some styling that is applied externally. Like if you said in the external style sheet, that you want the color of the heading text to be red, and in the heading tag, inside the style attribute, you said that you want the color as blue, then the color of the text would be blue, even if you had earlier specified as red. (just wanted to tell you that the inline styling has the greatest priority over other stylings)
Let’s have a look at the style attribute now. Here, we are going to do some really simple things, like changing the color of the text, changing the background color of some particular element, or changing the font-family of some particular element→
<!DOCTYPE html>
<html lang=”en”>
<head>
<meta charset=”UTF-8″>
<meta http-equiv=”X-UA-Compatible” content=”IE=edge”>
<meta name=”viewport” content=”width=device-width, initial-scale=1.0″>
<title>Some heading here…</title>
</head>
<body style=”background-color: gray;”>
<h1 style=”color: brown;”>This is a colored heading</h1>
<div>Lorem ipsum dolor sit amet consectetur adipisicing elit. Quia, id qui iusto consectetur deleniti vero nulla laborum quaerat, ipsum ea voluptatibus voluptatum voluptatem? Quasi at ad magni aut aperiam architecto.
Harum ad dolorum a tenetur et debitis, illum, blanditiis quaerat animi neque, eum ducimus commodi pariatur. Atque unde, nihil deserunt nam impedit consequatur exercitationem mollitia dignissimos sequi et odio ducimus.
Necessitatibus corporis modi ab maxime, molestiae distinctio animi quibusdam sit ipsam sed unde consequatur et cupiditate magnam fuga vero voluptas non accusamus voluptatem nulla porro. Quaerat voluptatibus cupiditate reiciendis ea.
Porro, placeat doloribus exercitationem incidunt, dolorem voluptates, pariatur fugiat dolore facere aliquid magni! Alias ipsum vero ut architecto sit! Iusto impedit, atque vero veniam quis aperiam minus nesciunt placeat obcaecati.</div>
<h2 style=”font-family:cursive”>This is another heading</h2>
<div style=”font-size: 20px;”>Lorem ipsum dolor sit amet consectetur adipisicing elit. Optio molestiae mollitia tempora deserunt porro nobis veritatis sint, incidunt, id, reiciendis rem quisquam molestias voluptates! Aperiam esse hic illo aliquid voluptatem.
Praesentium vitae, vero sequi facilis eius repellat distinctio animi tenetur similique velit reiciendis doloremque nihil illum obcaecati voluptatum odio harum enim temporibus corrupti, maiores quidem dignissimos reprehenderit earum. Exercitationem, consequuntur!
Rem reprehenderit minima vel adipisci fuga nobis, sapiente ullam beatae pariatur cum laudantium corporis odio facilis totam dolorem. Possimus nobis quibusdam exercitationem voluptas placeat laudantium mollitia minima dolorum iste culpa.</div>
</body>
</html>
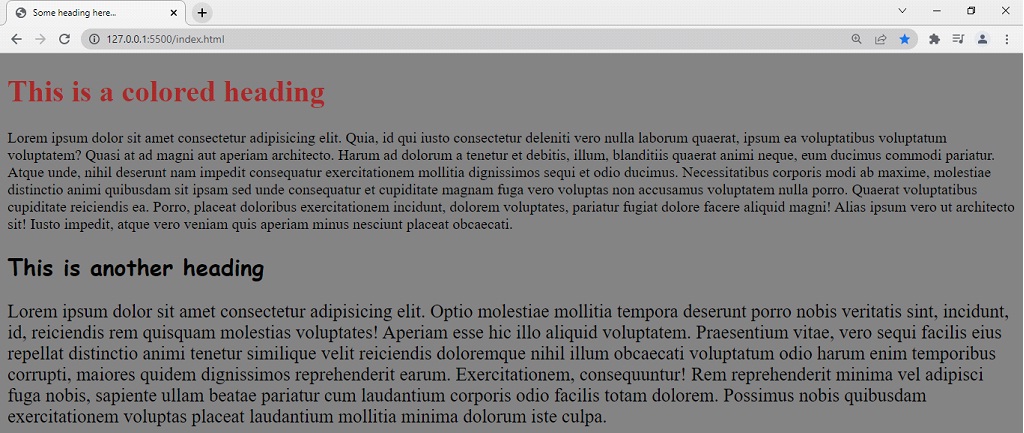
As you can see, we have applied the style attribute to many elements there. Remember that using the style attribute, we can style that particular element. It is not like we are styling one h1, and all the other h1 are getting styled. We have to go to the starting tag of that particular element and specify the styling. It is like personally going to an element and telling it, hey… your color would be red, your background color would be green, or something like that.
Now, the page looks much better than the standard one, which we have been seeing throughout this course. If we open the file in the browser, the output is something like this –
I hope this style attribute encourages learning how to style the web pages using CSS(Cascading Style Sheets). In this course, we have gone through many tags and many concepts which are necessary for you to create a webpage. You can explore further and try your hands on some projects for creating some websites.