For loop JavaScript
First of all, let’s have a look at one of the loops, which is for a loop. It is very easy to use, and once we start using it, you will become familiar with this for a loop. First of all, have a look at how are we going to write them for a loop –

You can ignore the variable that is created just above the for loop… and we are going to concentrate on the for loop for now. If you carefully observe the for loop there, we just have some things, like the for keyword itself, some variable, some comparison, and some increment/decrement/change operation.
Within the for loop, we are basically doing three things. First of all, we have created that variable I, through which, we are going to iterate through the loop. The thing next to it(after the semi-colon), is the condition. Till the condition is true, the loop is going to execute. The next thing(again after the semi 74
colon), is the change in the value of variable I, that we are making, so that the value goes near the terminating condition. (so that our loop ends execution).
After that, within the curly brackets, we are going to write the whole thing that we want to repeat a number of times. This is just going to be some code.
So, just to sum up what we saw just now, inside the brackets after the for statement, we are initializing some variables for iterations(here, the variable is i), and next we are checking some conditions. If the condition is found to be true, then only the loop will execute, and then we are finally doing some changes to the value of that variable. This helps us get closer to the termination of the loop.
The initialization is done only once, but the condition check and the change operation are done every time the loop has to execute.
The above code can be considered something like syntax. We can read it like this-
Run the following code for i from 0 till the value of i is less than 10, and every time increment I by 1. So, the variable i will be 0, then 1, then 2, then 3 and so on… and the loop will stop executing when the condition becomes false.
So, this way the loop will execute a specified number of times.
Let’s have an example program, to understand the working of for loop
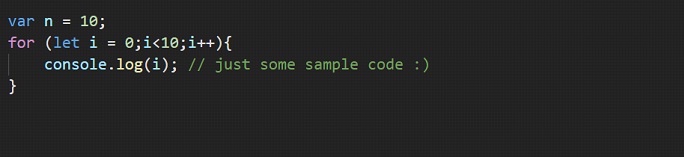
In the above program, we are trying to log the value of i, onto the console. In the first iteration, the value of I is 0, then 1, then 2 …, and so on up to 9. When the value of I becomes equal to 10, the condition is no more true, and we are out of the loop.
Remember that we are first of all creating a variable for iteration, then checking some condition(the loop is going to execute till the condition is true), and then we are giving some expression for incrementing. This is just to update the value for the iteration variable.
Also, you can create the variable that is being used for iteration, outside those brackets. This is how you can do it –
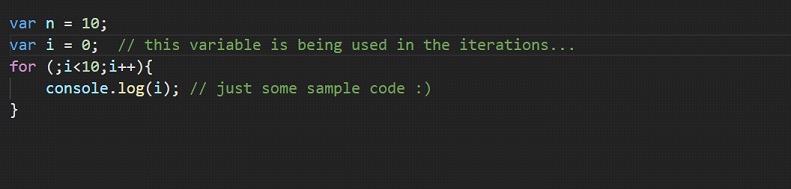 However, if we are creating the variable in a global context, then it is going to stay even after the loop has finished execution. But if the variable was created just for the for loop(what we are doing since we have been learning about for loop), it won’t be available after the loop has finished execution. It is always better if we do not create many variables in the global context(unless needed).
Let’s have another program, where we are logging the even numbers from 1 to 25 onto the console. Let’s try this thing –

If you have a look at the output, we have all the even numbers from 1 to 25. Let’s have a look –