CSS Margin
At times, we need to have some space around the element, we can simply put some margin on the required, or all sides of the element. For achieving this, we are going to make use of the margin-related properties. By the margin, we just mean that we are creating some space around the element, outside the defined borders.
Remember that the spaces are outside the borders. You can either specify the margins for different sides of the element, or you can also use the shorthand margin property to add the margins.
These are 4 properties for margins on different sides –
- margin-top: This specifies the margin at the top side
- margin-right: This specifies the margin on the right side
- margin-bottom: This specifies the margin at the bottom side
- margin-left: This specifies the margin on the right side
Along with this, we can also have the margin shorthand property.
Some of the values given to the properties can be –
- length – cm, px, in, etc
- % – you can specify the length in the percentage of the width of the container element
- inherit – the margin is to be inherited from its parent element.
You can also use the margin shorthand property, where you can specify the values for all the above four properties in a clockwise manner.
Let’s have a look at an example, which demonstrates the concept of margins –
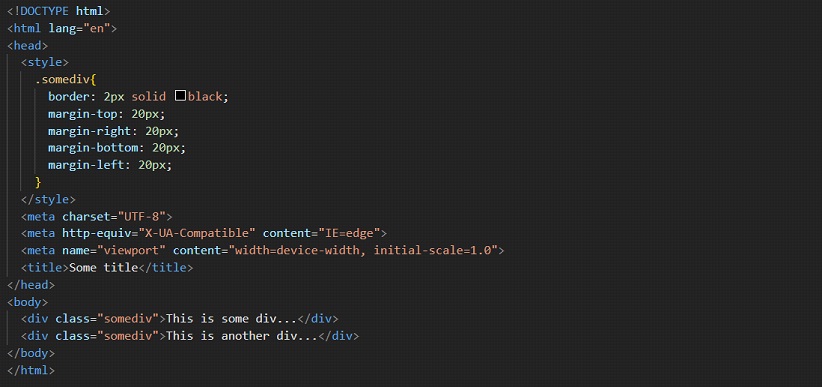
In the above code, there are two divs, which belong to some div class. In there, we have specified the margin properties for the top, right, bottom, and left. If we try to open the file in a browser, the output is something like this –

As you can see, we can see some space generated outside the border here. If you want to have some space around the element’s content, but inside the border, we can go with the option of padding.
Along with these 4 margin properties, we also got the margin shorthand property. With this, we can specify the margin for all sides. The sequence goes something clockwise, like a top, right, bottom, and left. Now, without wasting any time, let’s just move to the implementation related to the shorthand property.
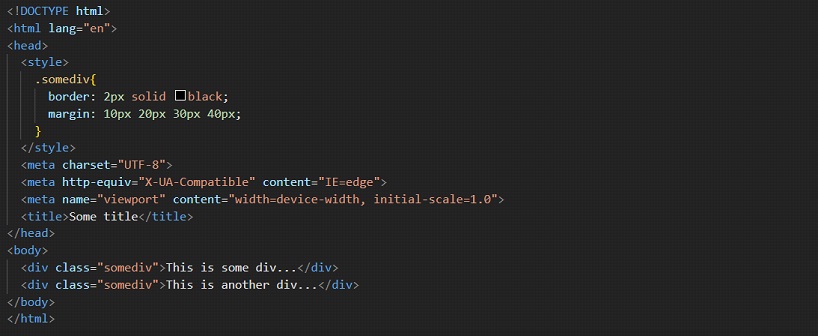
As you can see, we are giving the margin values for all the directions, using the margin shorthand property. The order, as specified earlier, goes clockwise, like a top, right, bottom, and left. Have a look at the output, where we can simply see the respective margins set for the specified elements.

Till now, if we are giving 4 values to the margin shorthand property, it is for all four sides. But we can also specify only 2 values or even a single value. If we are specifying 2 values, then the first value applies to the top and bottom, and the other value applies to the right and left sides. On the other hand, if we are giving a single value to the margin shorthand property, then the same value would be applied to all the sides.
So, If we are giving only one value to the margin shorthand property, the same value will be applied to all the sides. Let’s have an example for the same –
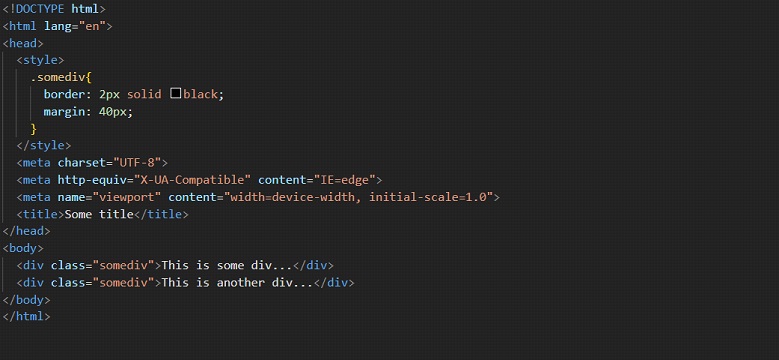
As you can see, we have only given a single value to the margin shorthand property, and as a result, all the sides of the element have a 40px margin.

So, this is how we use the margin, to create some space around the element, outside the given borders. Whenever we are required to give some margins, we can make use of the margin property.