CSS Borders
The border properties specify the things related to the border. Whenever we need to set the border for some element, we can make use of the border properties.
Here, we can set the border style, border color, and border width as well. Let’s have a look at all of them one by one. Also, we are going to have a look at the border shorthand property.
border-color: As the name says, this property helps us set the color for the border. We will have a look at some examples soon.
border-style: With this property, we can specify the border style. It may be a simple solid border, or dashed border, a dotted border, etc.
Let’s have a glimpse of some border styles:
- solid – It simply means that there is a solid line.
- dotted – It simply means that there is a dotted border.
- dashed – It simply means that there is a dashed border.
- groove – It creates a border as if it was embossed on the page.
There are some other values as well, like a ridge, double, etc.
border-width: With this property, we can specify the width of the border. The default value for the border width is medium. It can also have some other values like thin, medium, thick, or some other numerical value, like 5px or something.
Basically, the border width is a shorthand property for four properties, which include the border-top-width, border-right-width, border-bottom-width, and border left width.
So, the border-width property can have 1 to 4 values. If we are specifying only one value, it is applying it to all sides. Otherwise, we give values in order like the top right and bottom left. We can do this whenever we want the width of some sides to be different.
Point to be noted – before you give the width of the border for an element, you have to specify the style for the border, since the element has to have a border before you specify the width.
Let’s have an example implementation for borders now –
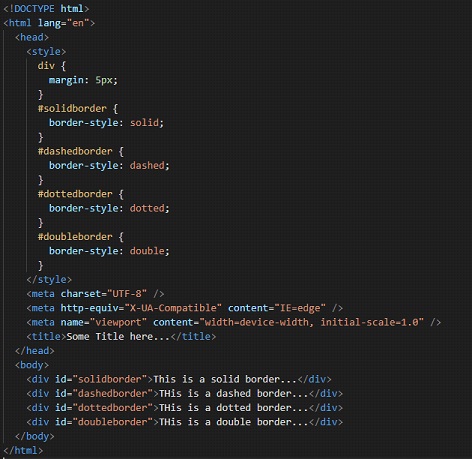
If you try to write the code and open the file in the browser, you can find different borders for the divs. As you can see, there are 4 divs, each with a different id. In the style element, we are specifying the borders for each div.
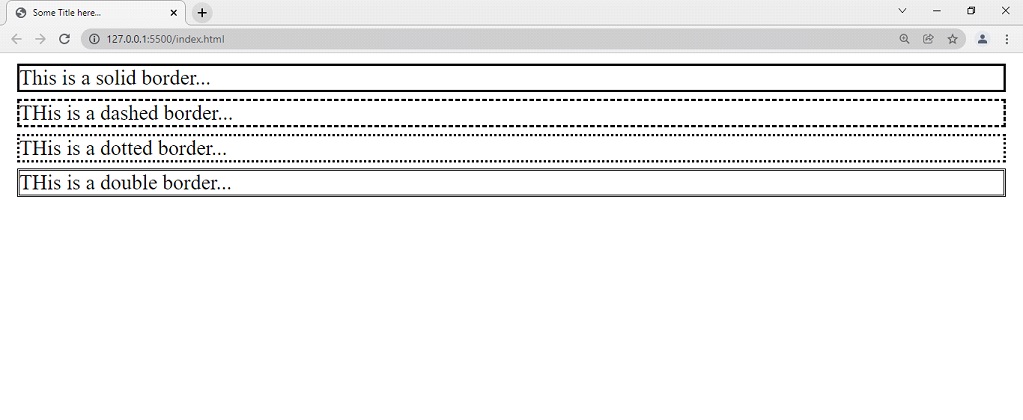
You can also set different styles for different sides of the borders –
you can use the border-top style to style the top side of the border. Similarly, the properties border-right-style, border-bottom-style, and border-left-style specify the border styles for the right side, bottom side, and left side respectively.
The following code demonstrates the same thing –
So, as you can see that there are different borders from different sides. So, in HTML, I have made a div tag with id multiple borders and given different borders to it from all sides. Here’s the output-

border-width –
This property specifies the width of the four sides of the border. The width is given in various sizes like cm, px, in, em, etc. You can also choose whether your border should be thick or thin or medium.
You can also give specific lengths to the sides of the borders.(this goes clockwise like the top, right, bottom, left)
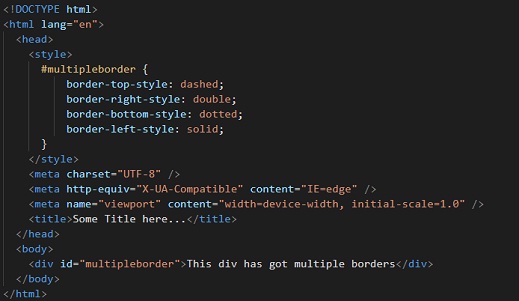
the below program demonstrates how you can set the width for different sides –
So, from the previous code, I have added border width to the div with multiple border id. The output I received is something like this –

border-color :
With this property, you can set the color of the borders. There are multiple ways to specify the color of the border, like the valid name of the color, the HEX code of the color or the RGB values, etc.
Let’s have an example implementation for the property border color.
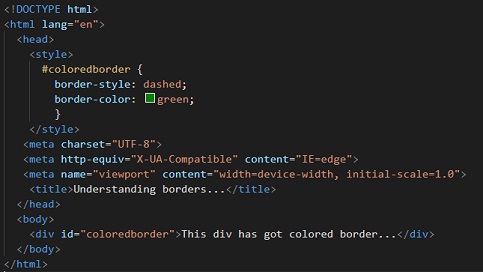
So, as you can see from the code I have added green color to the dashed border. So now, it looks something like this –

border –
This is a shorthand property where you can specify the properties like width, style, and color to create a border.
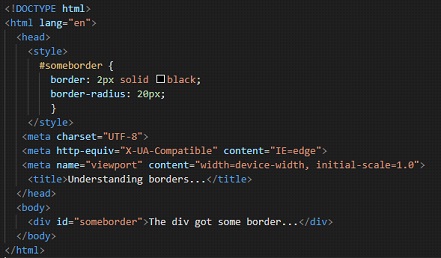
You can refer to the following code for understanding this border property.

You can see that we have used the border shorthand property to specify the width, style, and color of the border. The output to the following code is something like this –

So, this way, we got our 2px solid black border, which is pretty cool. You can try some other values and colors as well.
There is one more interesting thing about the borders that you can round them. To round the borders you have to use a property called border-radius, which will add some round corners to the borders.
You can play with this property, it is interesting.
You can also refer to the following code to understand the border-radius more –
So, as you can see here, we have added a border radius of 10px. So the border corners will be somewhat curved now. The output is something like this –

So, this is how we can work with borders. We can add borders of different styles, different colors, etc. Also, we can have different widths for the border, and we can round the border corners as well. We can set different values for different corners. Here as well, we can specify the border radius for different corners like this –
border-radius:20px 10px 20px 30px. This is like setting the top left, top right, bottom right, and bottom left values. The values can be also there in other units as well.
So, this way, you can make use of the different border-related properties, and you can also use the border shorthand property, to set some border for the element.